If you’ve ever tried to remove tile, you know that it can be a daunting task. However, with a little prep work and the right tools, it’s actually fairly easy! Discover the benefits of a dustless tile removal Phoenix with our expert technicians and state-of-the-art equipment, ensuring a clean and efficient removal process.
First, find a spot where you can begin removing the tile. This could be a loose or broken tile that can easily be lifted or a spot where the underlayment is exposed.
Preparation Is Key
Removing tile is a task that requires preparation. This may be in the form of mental preparation, physical or psychological preparation, or both.

In Wiktionary, the word preparation is defined as “preparing before something, especially to do something in a planned or organized way.”
The act of preparing your mind and body for something is important, and so is preparing your tools. Having the right tools and protective clothing is key to successfully removing your tiles the DIY way.
It also helps you avoid damaging your floor in the process of removing them. You must be careful when removing your tiles to not damage the underlayment, which is the layer that sits between the finished flooring and your subfloor.
You must also take steps to protect your furniture and other items that are in the room where you are removing the tiles. Covering them in drop cloths or plastic wrap will help to prevent shards of broken tile from damaging these items.
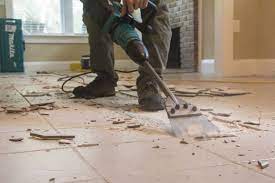
Make Sure You Have the Right Tools
Using the right tools for the job can make a big difference in the outcome of your project. This can help you to work faster and avoid mistakes that might otherwise result in wasted time and money.
The tools you need to remove tile will vary based on the type of job you are trying to accomplish and the size of the room that you’re working in. You’ll also want to think about safety as you work.
If you’re working with power tools, you should invest in safety glasses and a dust mask. This will protect you from small pieces of broken tile that might fly out and injure your eyes.
Another tool that you might consider is a floor scraper. These tools are designed to scrape the surface of your floor and help you to lift up tiles.
Start Small
Before you start chipping away at the tile, it’s important to remember that this is a project that will be physically strenuous and time-consuming. It’s also a job that will produce a lot of dust and other debris, so make sure to take the necessary precautions.
To begin, choose a spot where the underlayment (the layer of material that sits between the floor and subfloor) is exposed. This can be a place where tile has been removed, like under a vanity, or it can be a loose or broken section that you can easily pry up.
Once you have a good starting point, it’s time to remove the old tiles. Using either a long-handled floor scraper or an air hammer with a chisel set, work your way up the wall. This part of the process will take a little bit of time, but it will get easier as you move along and remove more tile.
Be Patient
It may seem like an odd choice to include the word patience in a DIY project, but it’s actually the key to removing tiles without damaging them. Tiling isn’t designed to come off, so the combination of strong adhesive, bonding the tile to the substrate and cementlike grout filling the gaps between tiles creates a firmly secured and waterproof layer that makes it difficult to remove without causing damage.
Taking the time to prep the work area and make sure you have all the tools you need is a good first step in removing tiles from your walls. Protective clothing is also a must, including hardy working gloves against accidental cuts and knee pads and goggles to protect your eyes from the flying dust.
You should also have a decent sized trash can handy, as the process will create large pieces of tile and grout that will need to be removed, cleaned and properly disposed of. Having this handy is the best way to keep your work space free from hazards and reduce the amount of clean-up you have to do afterward.
Leave a Reply